Using a Raspberry Pi as a home network Bastion Host
I’ve been at Teleport for a bit now and unlike the previous developer companies I’ve worked at. Teleports Community Edition provides something useful for my home setup. In this post I’ll outline why I converted an old Raspberry Pi to be a home bastion, and how you can do the same.
Preview
Why setup a home bastion?
Firstly, for the uninitiated a Bastion host is a special-purpose computer designed to provides access to a network and it’s been specifically designed to withstand attacks. A Bastion lives inside of a network vs a Jumphost and once setup it provides a central place to access machines inside that network.
But why have one at home? Even if you don’t have aren’t a /r/homelab enthusiast. I’ve found myself having multiple computers that I needed to access, after converting my Intel NUC to a K8s cluster, a few Pi Projects and building a home Linux/Windows Workstation.
Things I’m currently accessing using Teleport
- “Servers” ~ I’ve two home servers. One is an Intel NUC and another home made 2U test rig. These run a range of things, but mainly for testing new tech and experimenting with new Crypto Testnets and sometimes a CS:GO Server.
- “IoT Devices” ~ I’m always working on some kind of IoT Project. These are mostly ARM based, and having an easy way to access these devices and keep a journal of what I did is very helpful.
- “Applications & Control Panels”
- UniFi OS
- Homebridge
- AT&T Router UI
Why use Teleport for this?
Full Disclaimer: Teleport pays my bills, so I’m a little biased to say you should run be running Teleport.
Before I dive deep into the why, these are some other options:
- Plain old SSH - For an internal network, you could use SSH Keys but this lacks external access and lacks access internal apps.
- https://tailscale.com/ - A good solution for a single user
- https://www.balena.io/cloud - More IoT focuses and limited to 10 devices.
Benefits of Teleport
- Teleport UI / and console to quickly interact with devices.
- Available Externally via a Trusted Cluster.
- Can provide secure access to any local or cloud server.
- Github SSO Team Integration.
- Free! No limit on users or nodes.
- ARM Support, for both nodes and Teleport’s brain, the auth and proxy. It’s cheap to run on a Raspberry Pi.
Security
This post has been in my back log for a while as a few things didn’t feel quite right about the setup. There have been a few incidents of late in which Raspberry Pis have been a gateway to sensitive networks and patchy publicly available software as a gateway into corporate networks.
Lastly, after the Ubiquiti breach, I really wanted to limit IoT’s inbound access and I’ve increasing been removing devices to dial back home and I’ve been putting IoT devices on a dedicated VLAN. This might be overkill but I hope to explore the Pros of this in a future post.
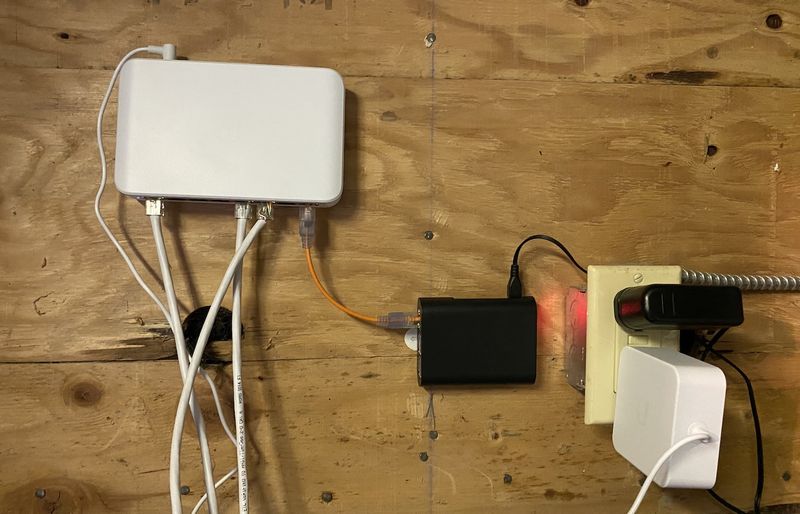
Hardware
For this build, I’m using:
- Raspberry Pi 3 Model B - $35
- Enokay Raspberry Pi 3 Model B B+ Case(Black) - $6.99
- Any SD Card. I’m currently using a 4GB SD but would recommend a larger 32 or 64GB card to store sessions.
- Wired Ethernet - Not required by it makes networking reliability easier.
Headless Raspberry Pi Setup
There are many great Raspberry Pi setup tutorials, these are mostly beginner focused and required a monitor. Below I’ve bootstrapped my Pi in a headless fashion. Setting up headless means I only need to download the OS, change some config files, plug in and it’ll be all setup.
The stages of setup are.
- Download Operating System. For this setup I’m using Ubuntu Server for Arm 20.04 LTS as it offers easier headless bootstrapping options.
- Flash SD Card using Balena Etcher
- Edit
cloud-configandnetwork-configfiles, examples below. - Plug in / Install updates
- Install & Setup Teleport
- Bonus: Using Teleport to Wake on Lan another machine on the local network.
1. Downloading Ubuntu Server for Arm 20.04 LTS
Download the latest Ubuntu 20.04 ARM binary
2.Burn Image
The next step is to burn the image to a MicroSD card. My preferred tool is balenaEtcher.
3. Edit cloud-config and network-config files
Ubuntu provides cloud-init for instances to be easily setup on boot. These files should be placed onto the SD card after the image is burnt.
cloud-config
# Disable password authentication with the SSH daemon
ssh_pwauth: false

# Created a default pi user and I've added my SSH key.
# Replace the SSH key with yours.
users:
- name: pi
  primary_group: pi
  groups: users
  system: true
  lock_passwd: false
  sudo: ['ALL=(ALL) NOPASSWD:ALL']
  groups: sudo
  ssh_authorized_keys:
    - ssh-ed25519 EXAMPLE...AccSMFqzUJ4VSjuZD benarent@ben-mbp
  shell: /bin/bash

# Basic Setup
runcmd:
  - sed -i -e '/^PermitRootLogin/s/^.*$/PermitRootLogin no/' /etc/ssh/sshd_config
  - sed -i -e '$aAllowUsers pi' /etc/ssh/sshd_config
  - restart ssh
  - 'mkdir -p /run/teleport'
  - 'cd /run/teleport && wget -O https://get.gravitational.com/teleport-v6.2.5-linux-arm64-bin.tar.gz'
  - 'tar -xvf https://get.gravitational.com/teleport-v6.2.5-linux-arm64-bin.tar.gz  -C /run/teleport/'
  - 'sudo ~/run/teleport/install'
  - 'systemctl enable teleport.service'

## Update apt database and upgrade packages on first boot
package_update: true
package_upgrade: true

# Setups Hostname to teleport-home
hostname: teleport-home
Optional: network-config
If you plan on using Wifi, setting network config makes it easy to get the pi on the network.
# This file contains a netplan-compatible configuration which cloud-init
version: 2
ethernets:
  eth0:
    dhcp4: true
    optional: true
wifis:
  wlan0:
    dhcp4: true
    optional: true
    access-points:
      "WIFI-NAME":
          password: "***"
4. Download MkCert and Install to create local CA
Teleport makes it super easy to obtain certificates for publicly accessible Teleport Proxies, but since I plan to run Teleport locally, I’m going to need a local CA. I’m going to be using mkcert to create the cert.
sudo apt install libnss3-tools

export VER="v1.3.0"
wget -O mkcert https://github.com/FiloSottile/mkcert/releases/download/${VER}/mkcert-${VER}-darwin-amd64

chmod +x mkcert
sudo mv mkcert /usr/local/bin
5. Setting up Avahi for mDNS
Avahi is a free zero-configuration networking implementation, including a system for multicast DNS/DNS-SD service discovery. Once setup, it’ll let me access the Pi via ‘teleport-home.local’ instead of using the IP.
# Install avahi
sudo apt-get install avahi-daemon
# Check that avahi is running using Systemd
sudo systemctl status avahi-daemon.service
6. Create Private CA for https://teleport-home.local
I’ll create the Certificate Authority (CA) on the Pi using MkCert and I’ll then export the CA root to be installed on Mac.
mkcert teleport-home.local "*.teleport-home.local"
# teleport-home.local+1-key.pem  teleport-home.local+1.pem
Export the CA Root
mkcert -CAROOT
#/home/ubuntu/.local/share/mkcert
# Concatenate root CA. This is saved locally and added to Mac Store.
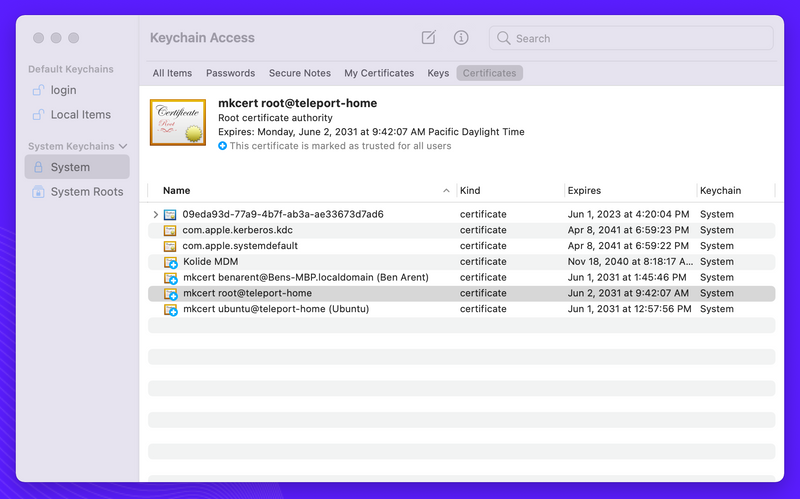
cat /home/ubuntu/.local/share/mkcert/rootCA.pemAfter I’ve obtained the root CA, I’ve saved the file locally. Once saved all you need to do is double click and check the KeyChain to see if the Root CA has been installed.
Setup & Start Teleport
To start you’ll need to SSH into the Pi and run teleport configure.
# SSH into the PI and run
teleport configure --cluster-name=pi-local -o file
This will mostly setup what you need, but you’ll need to add the https_keypairs which you created using MkCert. I’ve also gone ahead and enabled a few app services.
teleport:
  nodename: teleport-home
  data_dir: /var/lib/teleport
  log:
    output: stderr
    severity: INFO
  ca_pin: ""
auth_service:
  enabled: "yes"
  listen_addr: 0.0.0.0:3025
  cluster_name: teleport-home
ssh_service:
  enabled: "yes"
  labels:
    env: example
  commands:
  - name: hostname
    command: [hostname]
    period: 1m0s
proxy_service:
  enabled: "yes"
  listen_addr: 0.0.0.0:3023
  web_listen_addr: :443
  public_addr: teleport-home.local:443
  # HTTPS Keypairs are created by MkCert
  https_keypairs:
  - key_file: /var/lib/teleport/teleport-home.local+4-key.pem
    cert_file: /var/lib/teleport/teleport-home.local+4.pem
app_service:
  enabled: "yes"
  debug_app: true
  apps:
  - name: "unifi"
    uri: "https://192.168.0.1"
    public_addr: "unifi.teleport-home.local"
    insecure_skip_verify: true
    redirect:
    - "192.168.0.1"
  - name: "homebridge"
    uri: "http://homebridge.local"
Save this file and start Teleport. You can easily check things are working with teleport start -d, if this works for you skip onto using systemd systemctl start teleport.
Now teleport is running, I’ll need to create a new user.
tctl users add teleport-admin --roles=editor,access,auditor --logins=root,ubuntu,ec2-user
Use Teleport
On my local machine, I now able to access Teleport by visiting https://teleport-home.local.
I’m now able to access the Applications and access any nodes I add. If I ever want to add a new add, I’ll use tctl nodes add to create a join token.
When adding new nodes, I use a config file as this allows for easier settings of labels etc.
# /etc/teleport.yaml
teleport:
  nodename: duke
  data_dir: /var/lib/teleport
  log:
    output: stderr
    severity: INFO
  auth_token: xx
  auth_servers:
      - 192.168.0.64:3025
auth_service:
  enabled: "no"
proxy_service:
  enabled: "no"
ssh_service:
  enabled: "yes"
  labels:
    type: 2u
  commands:
  - name: hostname
    command: [hostname]
    period: 1m0s
Next Steps.
I’ve now a solid base that’ll provide easy access to my internal dashboards and an easy way to keep a record of what I’ve done on what host. These are my next steps.
- Add my microK8s
- Add a Trusted Cluster to provide secure remote access.
- Enrol my other nodes and pis into the cluster
Please leave a comment if you liked this and if you think I should add anything else.
Product Generalist
Currently in Oakland, CA